Homemade Elderberry Syrup
How to make your own Homemade Elderberry Syrup using dried elderberries, spices and honey. A great homemade immune boosting syrup.
I started making my own Homemade Elderberry Syrup several years ago. I love knowing exactly what is going into this immune boosting syrup and I also love the cost effectiveness of making my own Homemade Elderberry Syrup.
What are Elderberries?
Elderberries are a fruit that comes from the plant called Sambucus. They work as an anti-oxidant and are packed with Vitamin C/Vitamin A.
They are fantastic for boosting your immunity! There are many other amazing benefits that Elderberries provide, but those are the ones to take note of when it comes to staying healthy.

What are the benefits of taking Elderberry Syrup?
There are many benefits of Elderberry Syrup. The number one reason our family takes Elderberry Syrup is because it supports the immune system and is also excellent for fight the flu and colds. Elderberries naturally contain Vitamins C, B, and A which are all vitamins that pack a punch for your immune system.
What does Homemade Elderberry Syrup taste like?
Homemade Elderberry Syrup definitely tastes different than the store bought version. The store bought version typically has extra sweeteners and additives in it. Homemade Elderberry Syrup has a slightly sweet taste from the honey and a berry cider flavor from the spices you’ll add.

Is making your own Elderberry Syrup more cost effective than store bought?
Yes! You will save quite a bit of money making your own. I have done the rough math and store bought Elderberry Syrup is around $2.75 per ounce. Homemade Elderberry Syrup is around .$.93 an ounce to make. For our large family of 9, making it ourselves just makes sense.

Where do you purchase your dried Elderberries?
You can definitely purchase your dried elderberries at a local natural market.
Below are links where I purchase my elderberries, bottles for storage and fine mesh strainer from.
I purchase our raw honey from the local feed store.


Where do you store your Elderberry Syrup?
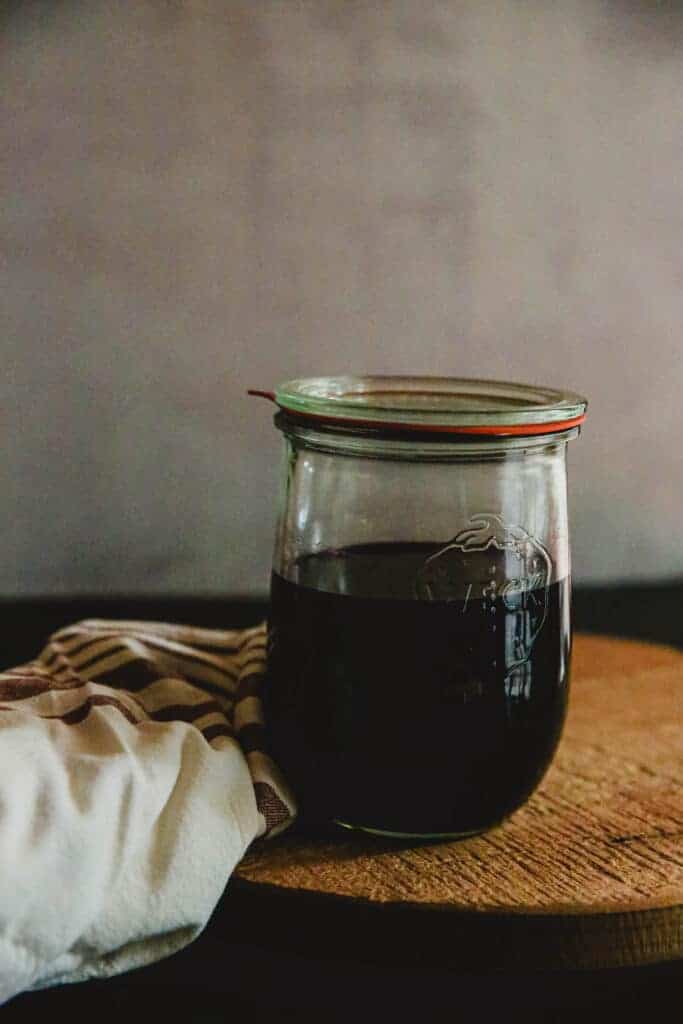
I store my Elderberry Syrup in my refrigerator in a glass jar. I’ve linked my two favorite styles of jars below. The Elderberry Syrup can last in your refrigerator for up to 3 months (although you’ll hopefully be using it up before then).

What age can your child start taking Elderberry Syrup?
I don’t give any Elderberry Syrup until after my little ones are one year old. I add honey to my Elderberry Syrup and anyone under one shouldn’t be consuming it.
What are the dosage amounts?
The standard dose is 1/2-1 teaspoon for children and 1/2-1 tablespoon for adults. We will add the Elderberry Syrup right to our shot glasses that have our liquid vitamins. If we develop colds or the flu, we will take the normal dosage every few hours instead of daily until the symptoms disappear.


Ingredients Needed:
- Water
- Dried Elderberries
- Cinnamon Sticks
- Cloves
- Raw Honey

Using an Instant Pot instead of the Stove Top
You can definitely use your Instant Pot for your Homemade Elderberry Syrup.
- Add your elderberries, cinnamon sticks, cloves and water to your Instant Pot (not the honey).
- Put the lid on your Instant Pot and lock it (make sure to listen to the beep so you know that it is locked properly).
- Double check that your vent is closed.
- Push the Manual Button and adjust it to 8 minutes. Once the 8 minutes are up, let it naturally release the pressure.
- After the pressure has released remove the lid.
- Turn off the Instant Pot and let the elderberry mixture cool.
- Follow the rest of the directions on the recipe card (starting with mashing the elderberries).
If you are new to an Instant Pot and aren’t sure how to use it, read this post here.
It’s a Beginner’s Guide to Understanding Your Instant Pot.
This is the Instant Pot I have had for many years and love!
Using a Crockpot instead of the Stove Top
You can absolutely use a crockpot to cook your homemade elderberry syrup.
- Add your elderberries, cinnamon sticks, cloves and water to your crockpot (not the honey).
- Put the lid on your crockpot and set to low for 6-8 hours.
- Turn off the crockpot and let the elderberry mixture cool.
- Follow the rest of the directions on the recipe card (starting with mashing the elderberries).
This is the Crockpot I have and use weekly.
Immunity Boosting Post
I also have an entire blog post written up that shares the vitamins and supplements we take daily. We add the Homemade Elderberry Syrup into our daily shot glasses of vitamins. You can find that post HERE.

Homemade Elderberry Syrup
Equipment
- Large Sauce Pan
Ingredients
- 7 Cups Water
- 1 ⅓ Cup Dried Elderberries
- 2 Sticks Cinnamon
- 1 tbsp Cloves
- 2 Cups Raw Honey
Instructions
- Pour the water into a large sauce pan. Add in the dried elderberries, cinnamon sticks and cloves.
- Bring to a boil. Once you have reached the boiling point, reduce the heat and place a lid on top. Simmer for 45 minutes to an hour.
- Remove the pot from the stove and let it cool until you're able to handle it.
- Mash the berries carefully with a spoon or potato masher.
- Pour the berry mixture through a finer strainer into a large bowl or large glass jar.
- Once the liquid has cooled completely, carefully stir in your raw honey.
- Pour your finished elderberry syrup into glass jars or mason jars to store in your refrigerator.
- The homemade elderberry syrup can be stored in your fridge for up to 3 months.


